Log into the Eturnity Solar Expert.
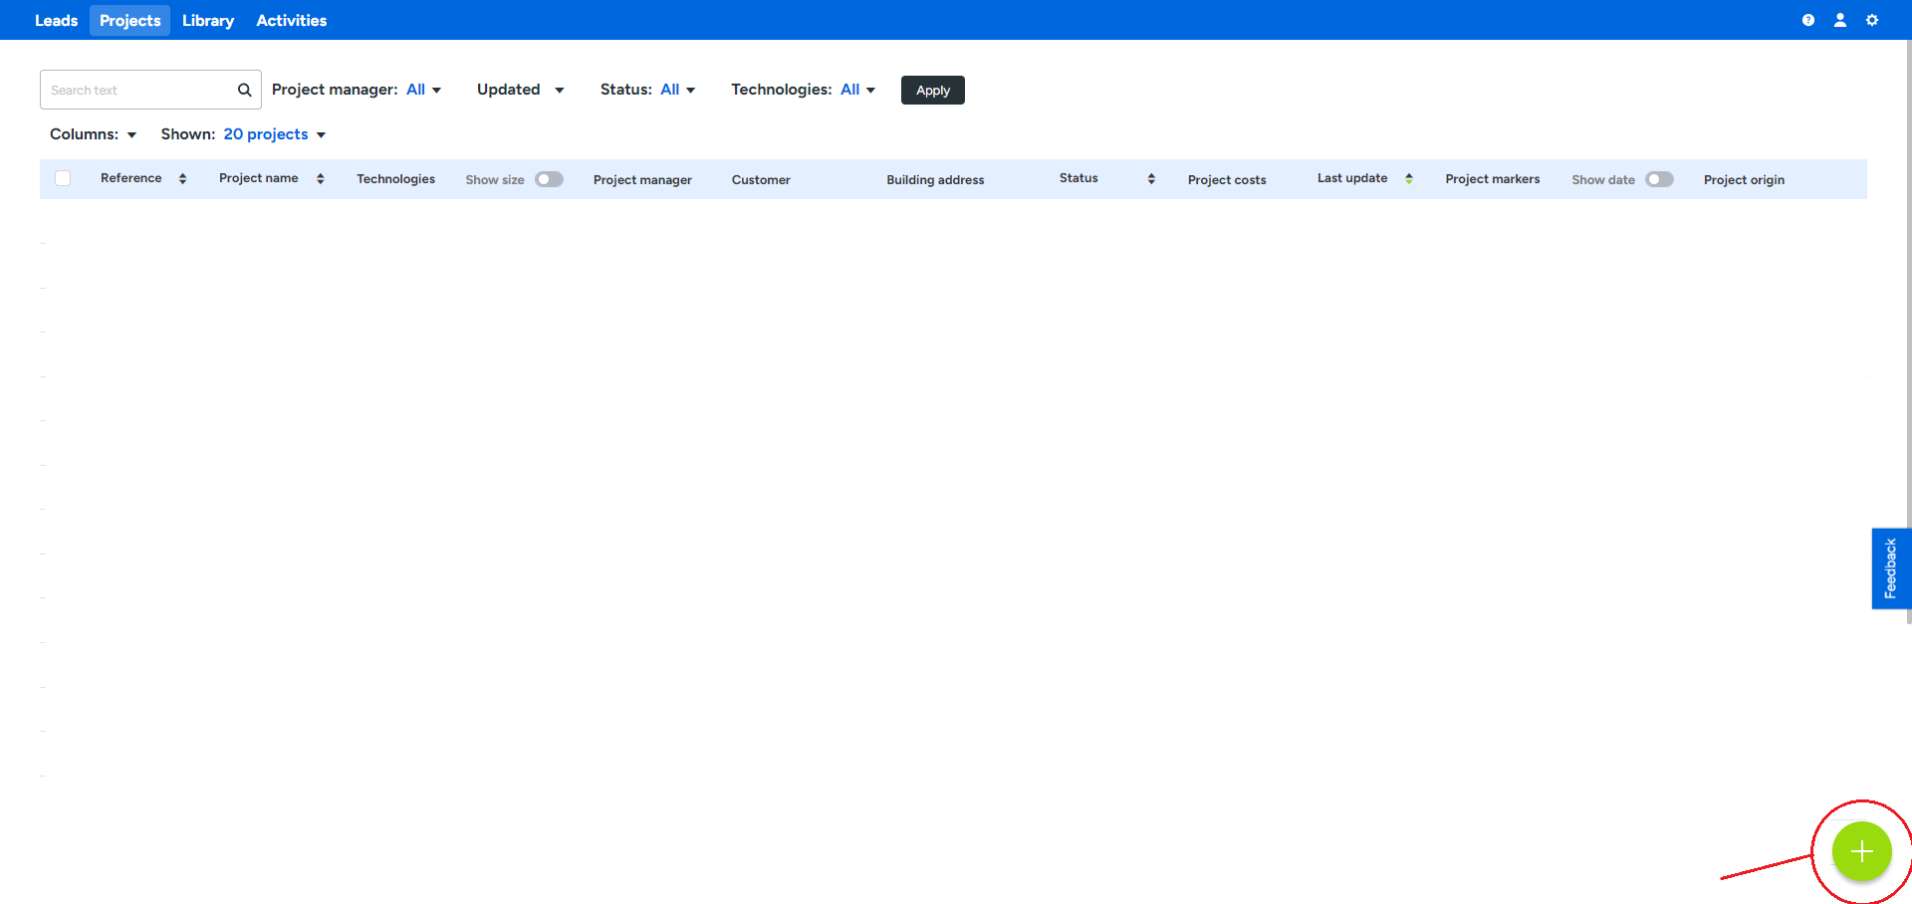
Create a new project using the green + button at the bottom right.
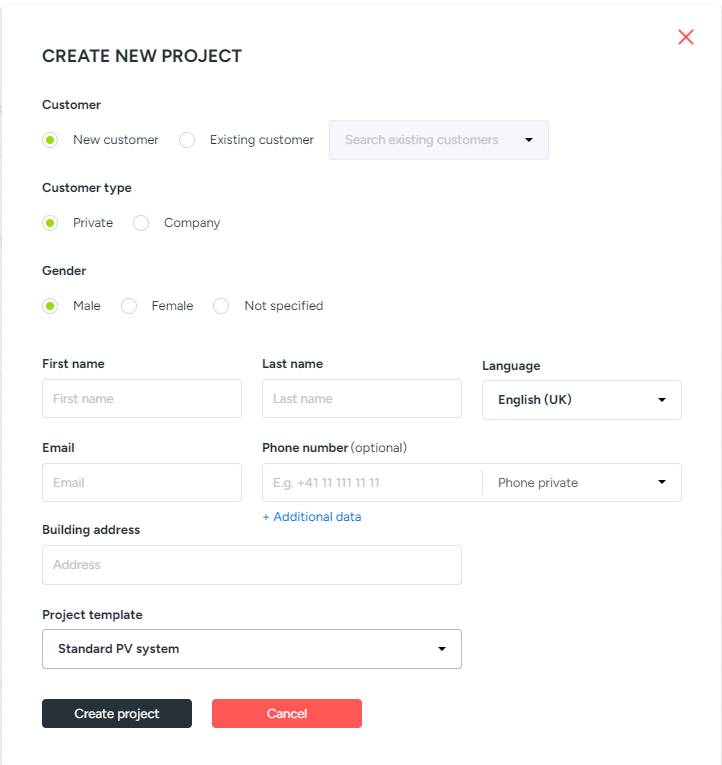
Enter customer details and the object address, then select the desired project template.
To plan a solar project quickly and effectively, we will go through the points from "Photovoltaics" to "Update Simulation" step by step in the left list.
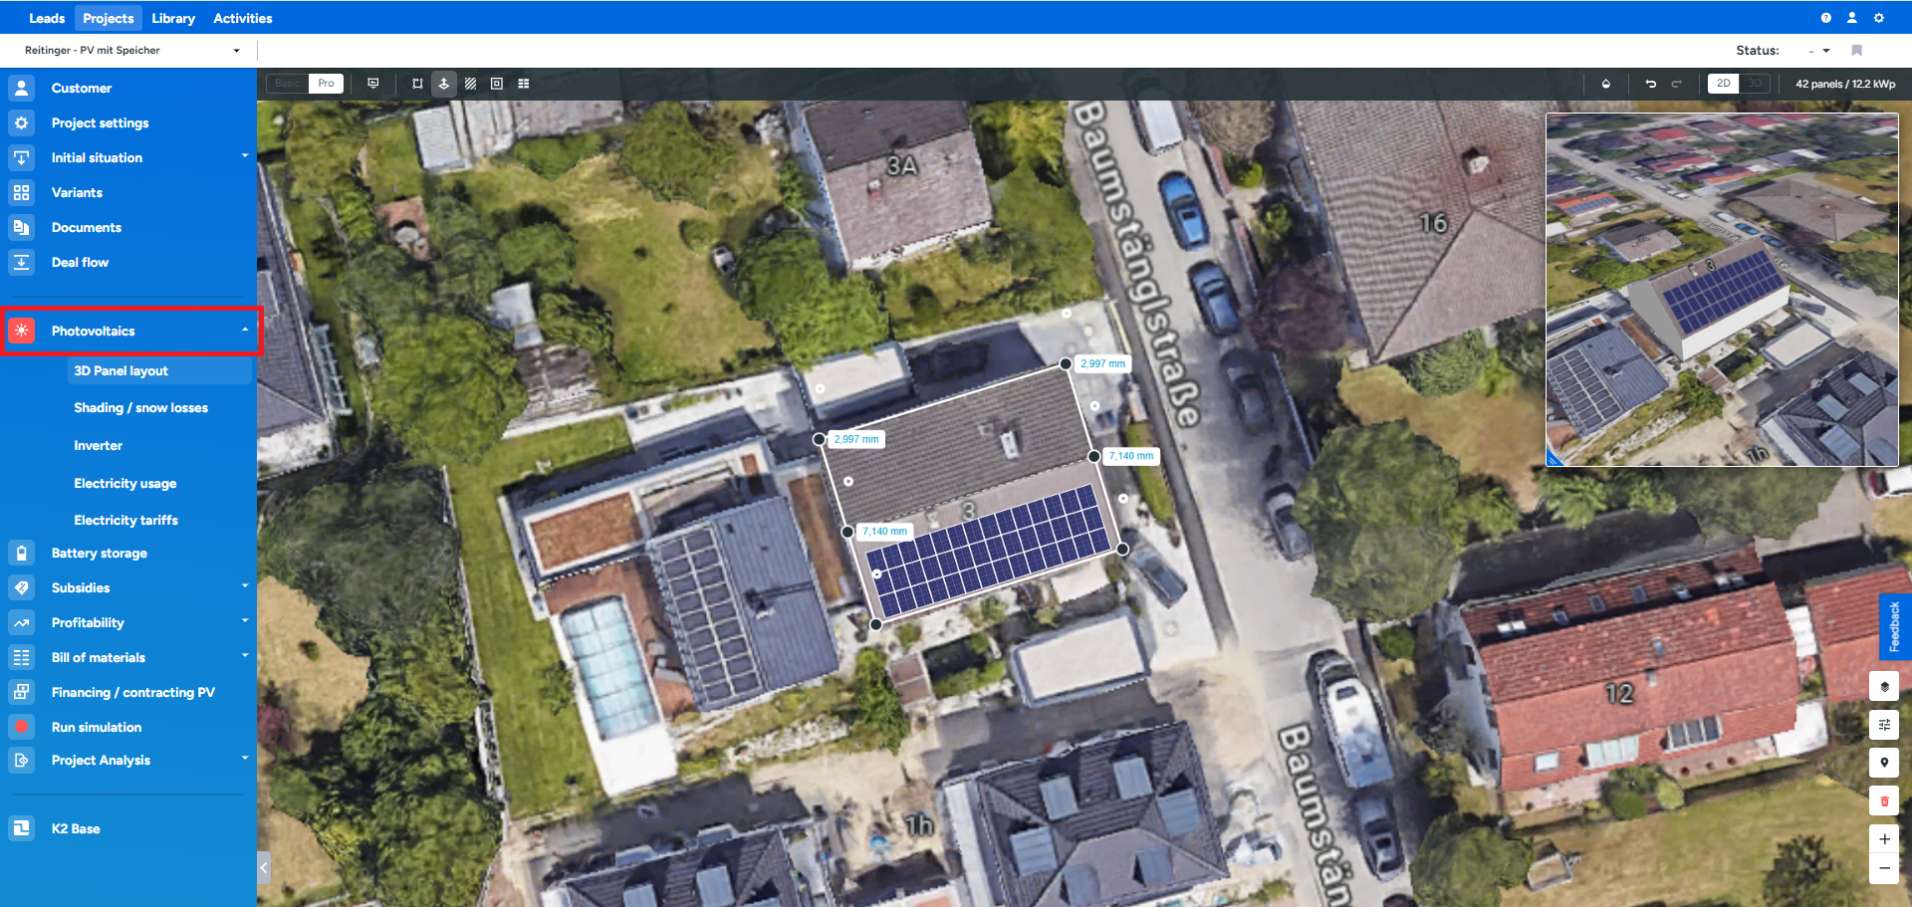
Clicking on the "Photovoltaics" point opens a submenu, automatically selecting the "3D Module Layout." Here, you can create your desired layout. Articles and videos explaining this can also be found in our Help Center.
For shading/snow losses, an expected loss due to shadows or snow can be entered. By default, this is set annually, but can be changed to monthly by toggling the switch.
Under Inverter, you get an overview of your planned PV system and can select one or more inverters from your library. On the far right under "Quantity," the quantity, for example, for module inverters, can be adjusted.
In the Electricity usage section, the combination of the heating system, domestic hot water system, and cooling system is defined. Standard load profiles are stored here, and the estimated annual electricity consumption can be adopted from them. Alternatively, manual entry of the value is also possible.
The desired energy supplier and tariff are defined under Electricity tariffs in the tariff library. If no selection is possible here (for example, in Germany), the tariff name is selected as consumption in € per kWh. The respective feed-in tariff is then output under this selection. If you want to calculate these points with other values, you can define them under "Custom Tariffs" also under Tariffs.
Under Battery Storage, a corresponding battery from your library can be selected for the PV system. If the desired component is not selectable here, it must first be added to the library. If the B section is not displayed at all, first activate the technology for this project under variants. The respective technology is activated when, as shown in the image below, it is highlighted in green. More information about Variants can be found below in this article
The procedure for the Energy Management section is the same as for Battery Storage.
Under subsidies, a subsidy specific to the project can be added as a fixed value. This is distinguished between Photovoltaics, Battery Storage, and Energy Management. Subsidies that depend on, for example, the size of the system must first be created in the library under the subsidies tab and can then be selected in the project.
Certain parameters that influence the profitability of the PV system or the battery can be regulated under the profitability section.
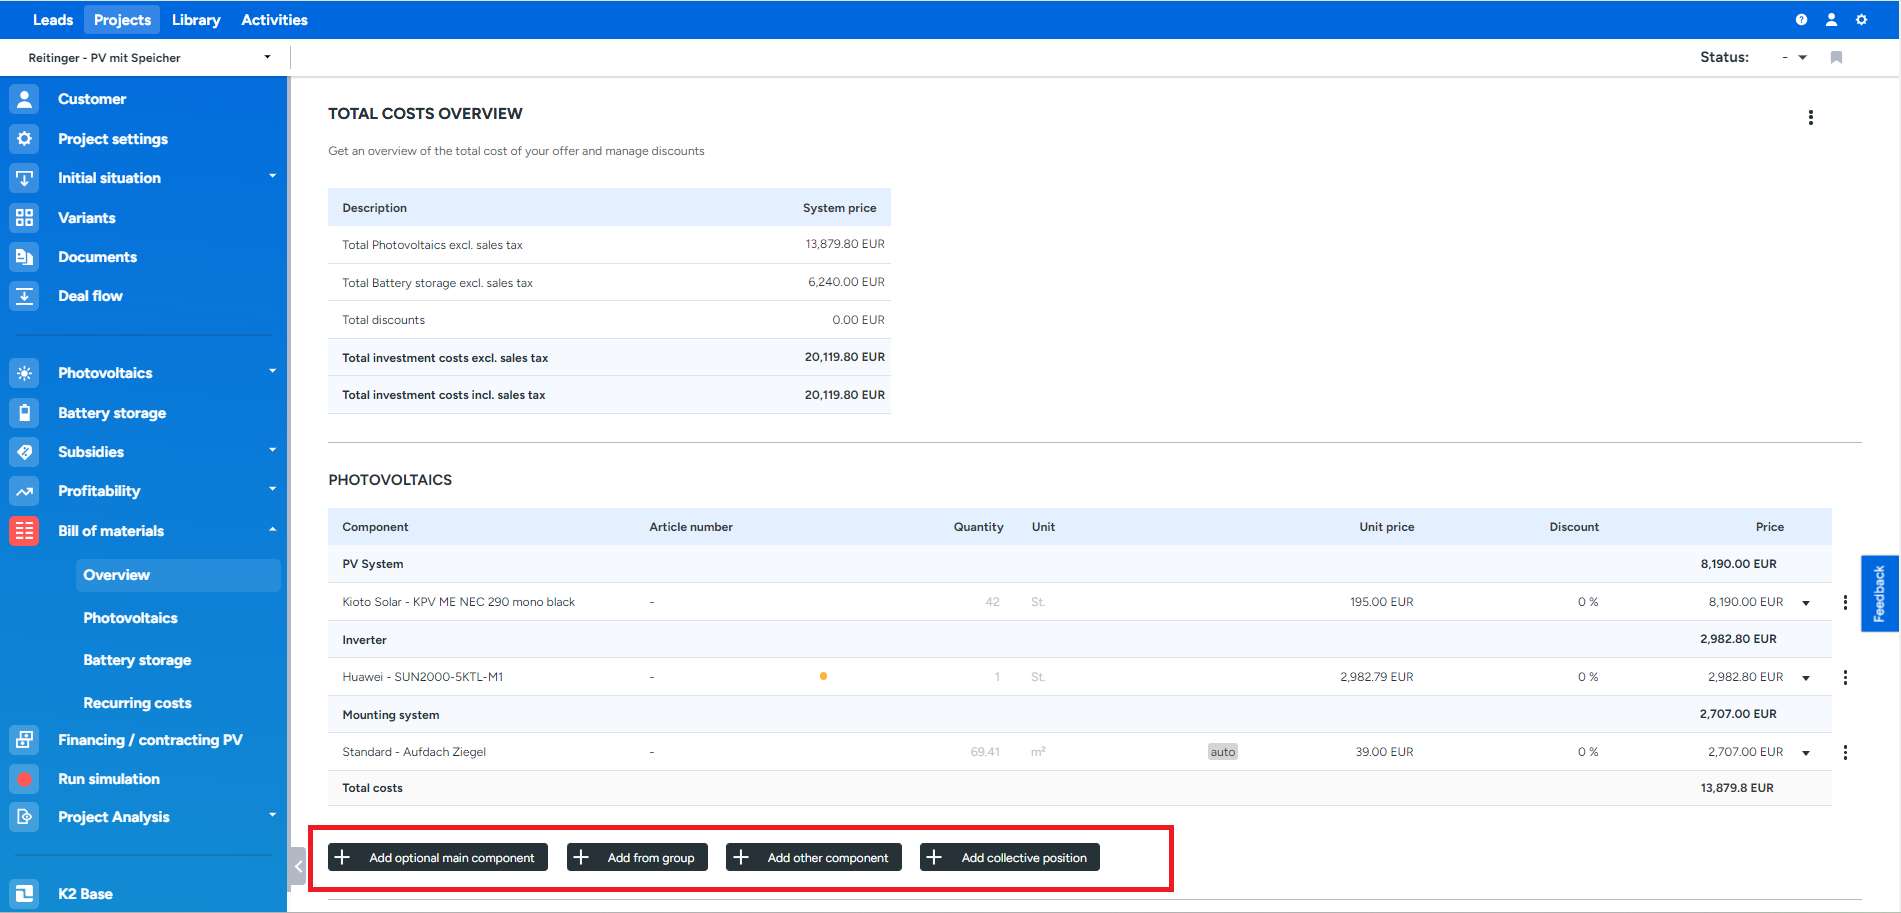
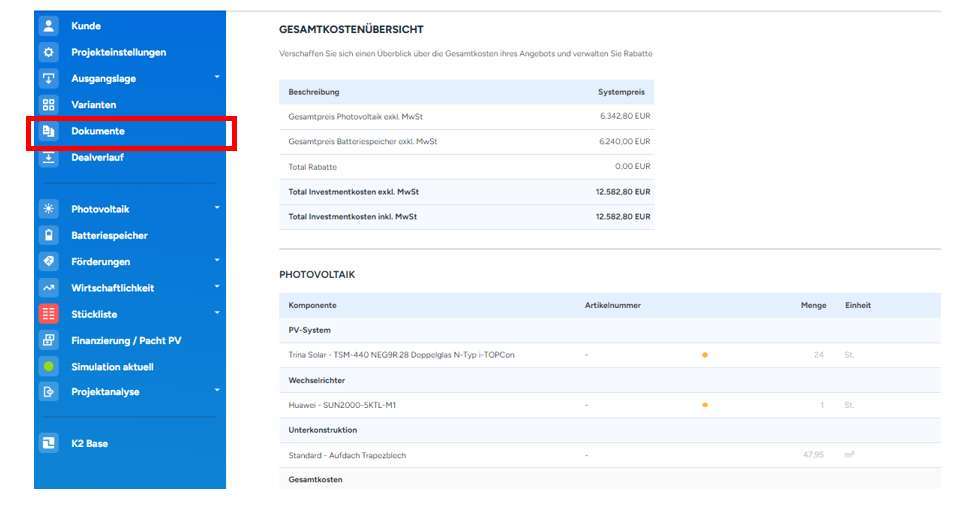
In the Bill of Materials, you have an overview of the entire project and its costs at the top.
Below are the detailed costs, divided into the respective groups of the PV system. Additional components previously created in the library can be added to the bill of materials using the black buttons below.
It is also possible to add further entries directly to the bill of materials without prior capture in the library. To do this, after clicking on "Add Other Component," enter an appropriate designation in the search field of the dropdown menu and select "Custom Component." Then, enter a corresponding price.
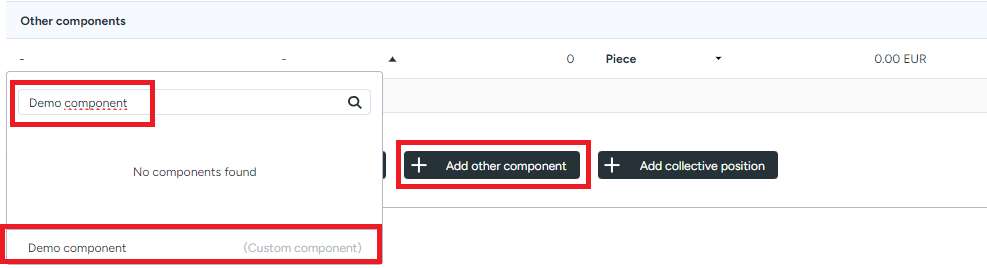
This approach is only conditionally recommended, as the component created in this way is not saved in the library. Thus, it can only be used in this one project.
At the end, a discount can be given for the entire project if desired.
Annual service fees or similar can be listed under Recurring Costs.
If financing or a leasing model is desired, the Financing/contracting PV section offers the necessary settings.
If the project is to be expanded through K2 Base editing, this can be done at the very bottom of the menu bar under K2 Base. More information can be found at this link: Eturnity AG Support - How does the process work with the K2 integration?
Once all points have been addressed, the run simulation button can be activated. After successful update, a corresponding message will appear, and the red dot will change color to green.
Subsequently, the desired offer document can be created under Documents.
There are basically two ways to do this:
- Create and export a .csv file, which can then be imported into further software, such as an ERP program. To do this, select "Standard Document" under Document Type and "Export Project." Clicking "Generate" will create the document.
- Create a custom offer document.
To do this, select "Individual Document" as the Document Type. After selecting the correct brand and address, the layout can be adjusted under "Document Configuration." With "Add PDF Pages," the rough number of pages of the offer is determined. Then, the corresponding page can be selected from the dropdown menu. If the desired page is not available for selection, it can also be added. More information can be found in this article below.
With a click on "Add Document," it is also possible to use a pre-made layout. These templates can be customized through our support.
Using the "Add Datasheet" button, the corresponding datasheet in the desired language can be integrated into the offer from the main components selected in the project.
The final offer can be previewed with the Preview button and modified if necessary. By clicking on the pen symbol, the associated information can be customized individually, and finally, the document can be generated with the "Generate" button.
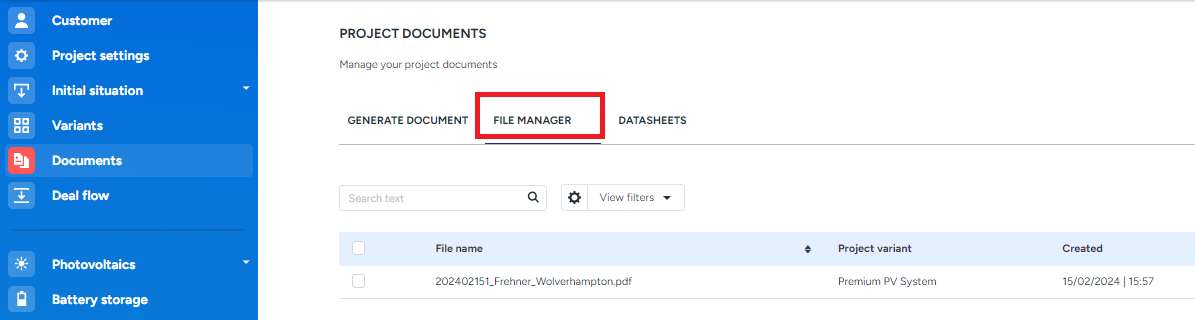
After each generation, the document is located in the File Manager, where it can be downloaded to send to your customer.
Please note that clicking "Generate" makes the project a billing object. This is important for your license with us. However, it is possible to send multiple offers within one project, i.e., with the same customer, without them being considered as extra billing objects.
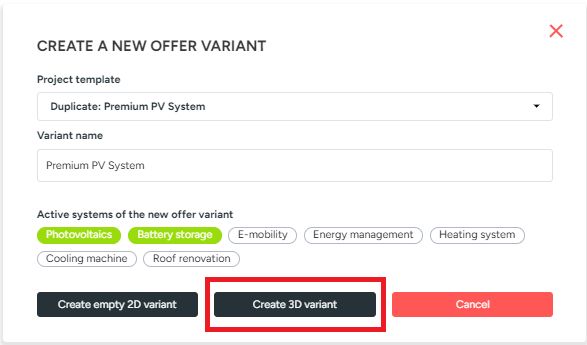
This is possible through the Variants section. You can copy an existing project using the "Duplicate" button.

In the subsequent input window, select the appropriate project template and assign a suitable name. Choose the desired technologies under "Active Systems." Then click "Create 3D Variant." The procedure is then identical to the one mentioned above. The only difference is that all settings made in the copied project are adopted.
Custom Pages in the Offer
As mentioned above, there is also the option to integrate your own pages into the offer. This is particularly useful for documents that change constantly or for additional pages not listed by default in the expert.
To do this, switch to Settings using the gear icon in the upper right corner.
Then, select the "Pages" section in the left column.
Clicking the "Create from File" button opens a corresponding input window.
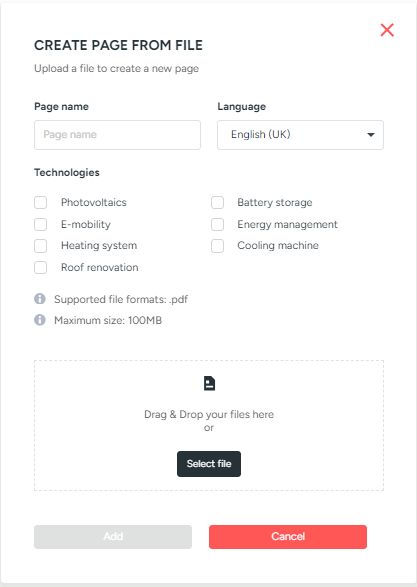
After filling in the page name and selecting the technology and file, the color of the "Add" button changes, and the page can be added. After that, it can be selected in the offer as described above.